Showing posts with label Firsts. Show all posts

Wednesday, November 23, 2016

Turning Logs Into Lumber...

2:05 pm - 36 degrees - raining and foggy...

Most people get their lumber from the local lumber store or local big box store, which is what we usually do.  However, Tony wants to build a woodshed and needs larger lumber, which of course costs more.  After crunching the numbers, he saw that it would actually save us some cash to have the lumber milled out versus going and buying it at the store. 

One of the trees that was felled to make lumber.


So a couple weekends ago Tony had a local guy come up with his portable bandsaw mill to mill out some lumber for our woodshed project.  A portable mill is basically a piece of track, called the bed, on which an adjustable band saw rolls back and forth on.  You lay the log on the bed and trim slices off the log with the band saw.

After they got the portable bandsaw mill in place, it was crucial that the bed, which is the reference point for the entire mill, was level and square.  If the bed isn’t level and square, all the lumber that is produced will be slightly off. 

After the mill was all set up, it was time to load one of the 20’ logs on to the bed.  Depending on the size of the log, this can be a bit tricky.  The portable sawmill had a wench that was used to hoist the logs into place, but an excavator was used to the place the larger logs that were just too big for the wench to pull.

Cutting the end off.

The first cuts made on a log produce slabs, which is a piece of wood that has bark on one side and a clean cut on the other.  The next cut is a flitch cut, which is a board with two flat sides, but has bark on one or more edges (this is also known as live edge boards).  For the typical log, it takes about two cuts on each of the four sides – one slab cut and one flitch cut.  In theory, that will result in a large, square piece of wood called a cant.

Making the first cut on the log.


Second cut on the log.


After all four sides have been cut, they start milling the lumber.


Of course not all logs are the same.  Depending on the size of a log, eight cuts (4 slab cuts and 4 flitch cuts) can waste a lot of wood.  However, the edges of the flitch cuts can sometimes be ripped down to make a good board or the can be used at a live edge board.

Out of four 20’ logs, we ended up with four 20’ 6x12 beams, twenty-four 20’ 2x12s, four 20’ 1x12s and a pile of miscellaneous boards and live edge boards.

Left over piles of scrap and live edge boards.

Pile of scrap live edge boards.
I'm sure we can think of something to do with these!

Left over logs.

When milling your own lumber you must also be aware that you can totally ruin everything you have just milled by improper drying.  Softwoods develop fewer defects than hardwoods, partly because the total overall shrinkage is generally less.  Some warp is inevitable and you may want to saw hardwoods a bit larger to be sure you can get the final planed thickness you are wanting.

To properly dry freshly milled lumber, you must be quick and carefully sticker the boards.  Stickers are pieces of wood that provide air gaps in a pile of drying lumber.  Stickers are only ¾ x ¾ inches.  This is a great use for scrap lumber.  Using dry stickers every 16 to 18 inches or, according to some, as close as every 12 inches for hardwood lumber.  The purpose is mainly to separate wet boards and to allow air circulation, but the wood's own weight in the pile helps control warping.  Using stickers at the ends of the piles reduces end checking as well as warping.  Tony also painted the ends of the boards with anchor seal which also helps to prevent end checking.

Turning logs into lumber was definitely a learning experience. 

Tony spent one full day picking out the trees he wanted to use, falling the trees, limbing the logs, and hauling them into place along the driveway.  Another full day was spent milling those logs into lumber.  And yet another full day was spent cleaning up most of the mess and stacking the lumber.  Three days into that project and we still have several piles of unused logs, scraps, slabs and live edge boards and we have to wait until the freshly milled lumber has time to dry a bit.  

In the end, yes it did save us some cash, but it did cost more in time.

Tuesday, April 26, 2016

Digging For Razor Clams...

11:30 am - 51 degrees out - scattered clouds...

Eating locally grown food is great, but when you are able to go directly to the foods source and harvest it yourself, that’s even better!

Our last trip to the Long Beach Peninsula, (which was a couple weeks ago) just happened to coincide with clamming season.  Yea!!!

The kids and I have never been digging for clams before.  There is a stock pile of clam-digging supplies at our beach property, but we’ve never used them.  But this trip, we thought we’d give it a try.

Long Beach locals swear that clam-digging is in their blood.  But, for us newbie’s, it was a very fun (and gross) learning experience.

First, we dug out our clam-digging supplies and made sure there were enough clam guns for everyone.  Then we ran into town to get our clamming licenses at Jack’s Country Store along with a list of the clamming tides.  All clam-diggers 15 years of age or older must have an applicable clamming license to harvest razor clams on any beach.  Children don’t need a license as long as they’re with an adult who has one.

Swung by Jack's Country Store to grab a clamming license.

After not so patiently waiting for the clamming tide to come, I got all the kids (4 total) and supplies loaded into our rig and we headed for the beach – with no clue how to properly clam dig!

We dragged our clam guns and netted bags down to the wet sand, to an area that was still nice and smooth, away from all the other clam-diggers.  We were told to look for air bubbles or dimples in the sand, so we started wandering around looking.  After about a minute or so, we found a “dimple”.  I called the kids over so we could all see what would happen when I plunged the long, cylindrical tube of aluminum into the sand, plugged the tiny air hole on the handle, and pulled it back up out of the sand... and was rewarded with jumping up and down and shouts of excitement since we had just dug up our first clam!

Our first razor clam!
  
Razor Clam

Things got a little crazy after that first clam was dug up.  Kids were running back and forth shouting “I found a dimple!”, “ACK, it squirted me!”, “GOT ONE!” and so on.  It was quite amusing to watch as they ran around from dimple to dimple, placing their clam guns over the center of the dimple, and do their little squiggle dance as they plunged their gun into the wet sand.  When they pulled up all the sand contained within the gun, dumping the contents to the side, they quickly dug through that pile or dove down into the hole to grab that clam.    

We found dimples!  AKA Razor Clam Show.

Clam-digging cousins.
  

Our last razor clam of the day.

It only took about a half an hour for all of us to reach our limit of 15 razor clams each.  Being new to this, our razor clams weren’t all perfect, we did manage to cut a few in half when we plunged the clam gun into the sand, but all clam-diggers are required to keep the first 15 clams they dig up, regardless of size or if you accidentally cut them in half.

Everyone had a lot of fun digging for the clams, but the clean-up...well that wasn’t as much fun.  In fact, it was gross, but we got the job done.  If you want to clean your own clams, it’s a good idea to look up how to clean them first so you may clean them safely and correctly (click here for instructions).  Of if you don’t want to clean them yourself, you can drop them off at a local seafood store or cannery to have them professionally cleaned and vacuum-packed.

We really did luck out.  We had an absolutely perfect evening and great success for our first clam-dig. 

Thursday, December 31, 2015

20 Small Reminders...

12:42 pm - 23 degrees - overcast, strong winds...

Are resolutions the same as a to-do-list?  I don’t really know but I work really well when I have a list.  Anyways... here are a few small reminders I am aiming to keep in mind for the new year!


1. Believe that anything is possible.

2. Choose a narrow path.  The sooner you pinpoint exactly what you want to achieve in your live, what you want your legacy to be, the sooner it will happen for you.  Don’t choose the well beaten path; create your own.  Dare to be different and aim for the moon.

3. Break a bad habit.

4. Work hard(er).  Start each day with goals.  Set your goals high and higher... your limits are only those you believe to be true.

5. Purge the unnecessary and decrease clutter.

6. Embrace change.  If life were consistent and without ups and downs, it would be boring, bleak and monotone.  We’re here to dodge bullets, get back up when we’re kicked down and make decisions for ourselves.  It’s all about building your character.  Never fear change, it could be exactly what you need.

7. Never allow waiting to become a habit.  Live your dreams and take risks.  Life is happening now.

8. Eat more real food.

9. Try to grow more food.

10. Take care of your body.  It’s the only place you have to live.  But never forget you don’t have a body, you have a soul.  Your exterior will never define your interior.

11. Exercise daily even when it sounds like a terrible idea. 

12. Its okay to eat cereal for dinner.  You only live once...

13. Make time for creativity.

14. Be loyal.  In love, friendships, and most importantly with your family.  Stay true to your word.

15. Hug the ones I love more.

16. Find the best in others.

17. Show others the best in me.

18. Own your mistakes.  The only way to learn is to make mistakes.  The only way to learn from mistakes is to own them.

19. A lot can happen in a year.

20. You’ll never be as young as you are right now.

Saturday, March 7, 2015

We Have Power...

11:55 am - 63 degrees - gorgeous day...

I am beyond excited to finally be able to say... we have power! 

It has taken a long time to get to this point - reliable 24 hour power.  The end of May will mark 5 years living off-grid with only a generator for our occasional power needs.

For the past several months, after Tony got home from work, he would go straight to work again on our “control room”.  Some concrete, framing, plywood, insulation, sheetrock and the room under the stairwell was enclosed to house our power system.


Once the control room was enclosed Tony was busy making battery cables, connecting the 16 deep cycle batteries together, connecting the batteries to the inverter, wiring the inverter, numerous trips to different stores to get parts, and several phone calls to Magnum Energy to get questions answered.  


There are still a few small details that need to be finished or worked out, but for the most part... our battery bank and inverter are finally hooked up and working!

Last night was the first time we were able to turn on a lamp without having to run outside to turn on the generator first.  It is amazing how exciting it is to be able to turn on a simple lamp.  

This morning, as I'm tying out this blog post on our desk top computer that is being powered by our own power system... I am in awe of my amazingly awesome husband who I believe can do anything and is Superman in our children's eyes.

Sunday, May 18, 2014

Sustainable Preparedness Expo...

6:51 pm - 47 degrees - raining...

Today Tony and I spent the day at the Sustainable Preparedness Expo at the Portland Expo Center.  While wandering around we bummed into some friends – “Mr & Mrs Wranglerstar”.  They were impressively surrounded by many of their YouTube followers, so we just stopped to say a quick hello.


The Expo was full of vendors, hands-on workshops, and training sessions on preparedness, homesteading, and sustainable living; which attracted people from all walks of life.  The focus of this Expo was quality education.  It’s about serious training – not entertainment. 

Robert Norris - Beekeeping 101

Titan Ready USA
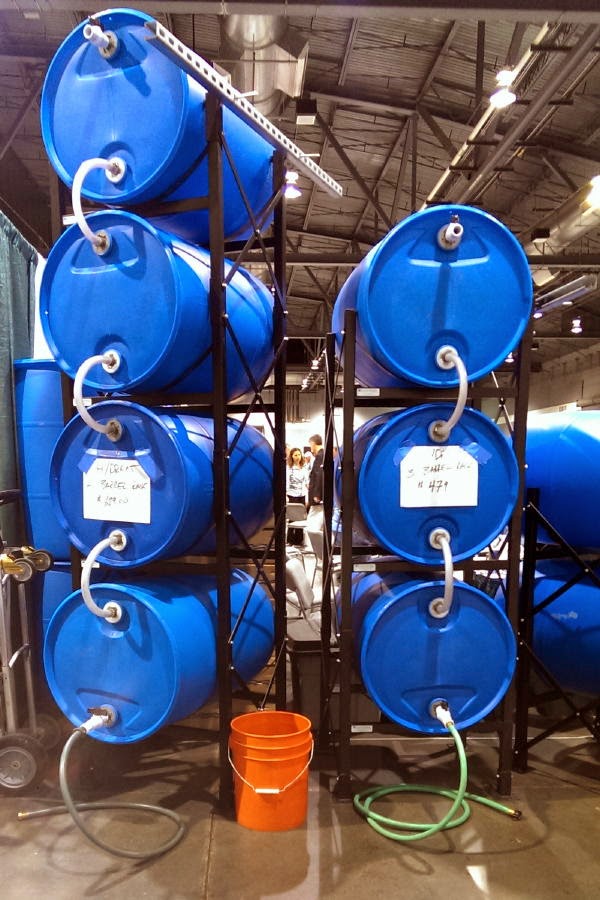
Water Storage Systems

Glenn Meder - Treating Water in an Emergency

Tactical Woodgas
Power your generator from wood smoke!

Matt Crume - Micro-Hydro Basics: Generate Free Electricity From a Creek
  
The large attendance at this Expo workshop just goes to prove that people are HUNGRY for knowledge.  They know something’s wrong – with our government, with the economy, with their vulnerability when it comes to empty grocery store shelves after any disruption – and they want to learn more about how to help themselves.

This was the first Sustainable Preparedness expo we have attended.  More and more people are waking up to the fact that our economy is not as stable and trouble-free as they have been led to believe.  It’s encouraging to see people actively seeking information on how to help themselves.

Sunday, January 27, 2013

Weeknights And Weekends...

8:57 pm - 32 degrees - 6+ inches of new snow and still snowing...
 
Now that winter has descended upon us and the days are short, the work on the house has slowed down to the few hours of daylight on the weekends. 
 
When we bought our property in late 2005, we had grand expectations.  I had it in my head that things would happen by a certain time.  They didn’t.  Since then, we have had to alter our expectations a bit.  That doesn’t mean we are settling, it just means we have to wait a little bit longer for our dreams to come true.
 
We are not rich, we do not have boatloads of cash, and we are not able to buy everything brand new.  We are an average single income family.  My husband works while I stay home with our two young children.  All of the work put into clearing the build site and building our home, is being done on weeknights and weekends.  The majority of the funding for this crazy project is coming out of our pockets a little at a time.  Since we are doing everything ourselves and out of pocket, progress on the house is slow and seems to come in spurts. 
 
We have learned a lot along the way with a lot of shoulda’, coulda’, woulda’s.  As you can see by the pictures from our first two years on the project (we are now on year seven), we sometimes do things a little backwards.  Although our home is not finished yet, we are still having fun and enjoying this phase of our off-grid adventure, even though we do hit the occasional speed bump.  {click on the photos for larger viewing}